In this lesson, you'll:
- Set up a development space for your token minter project.
- Learn about the standard code provided with the Anchor framework.
- Understand the differences between Solana programs and Ethereum smart contracts.
Today, we're setting up the development area for our token minter project, including organizing our project directory and understanding the framework's standard code. We'll also compare Solana programs written in Solidity to Ethereum smart contracts.
First, create a new folder for your project. This is where all your files and work will live. After creating the folder, open a terminal in that folder and run this command:
anchor init spl-token-minter --solidity
This will install the necessary components for your project, but it might take a bit of time.
Next, go into your project's folder with this command:
cd spl-token-minter
To start VSCode, enter:
code .
In VSCode, you'll see your project organized like this:
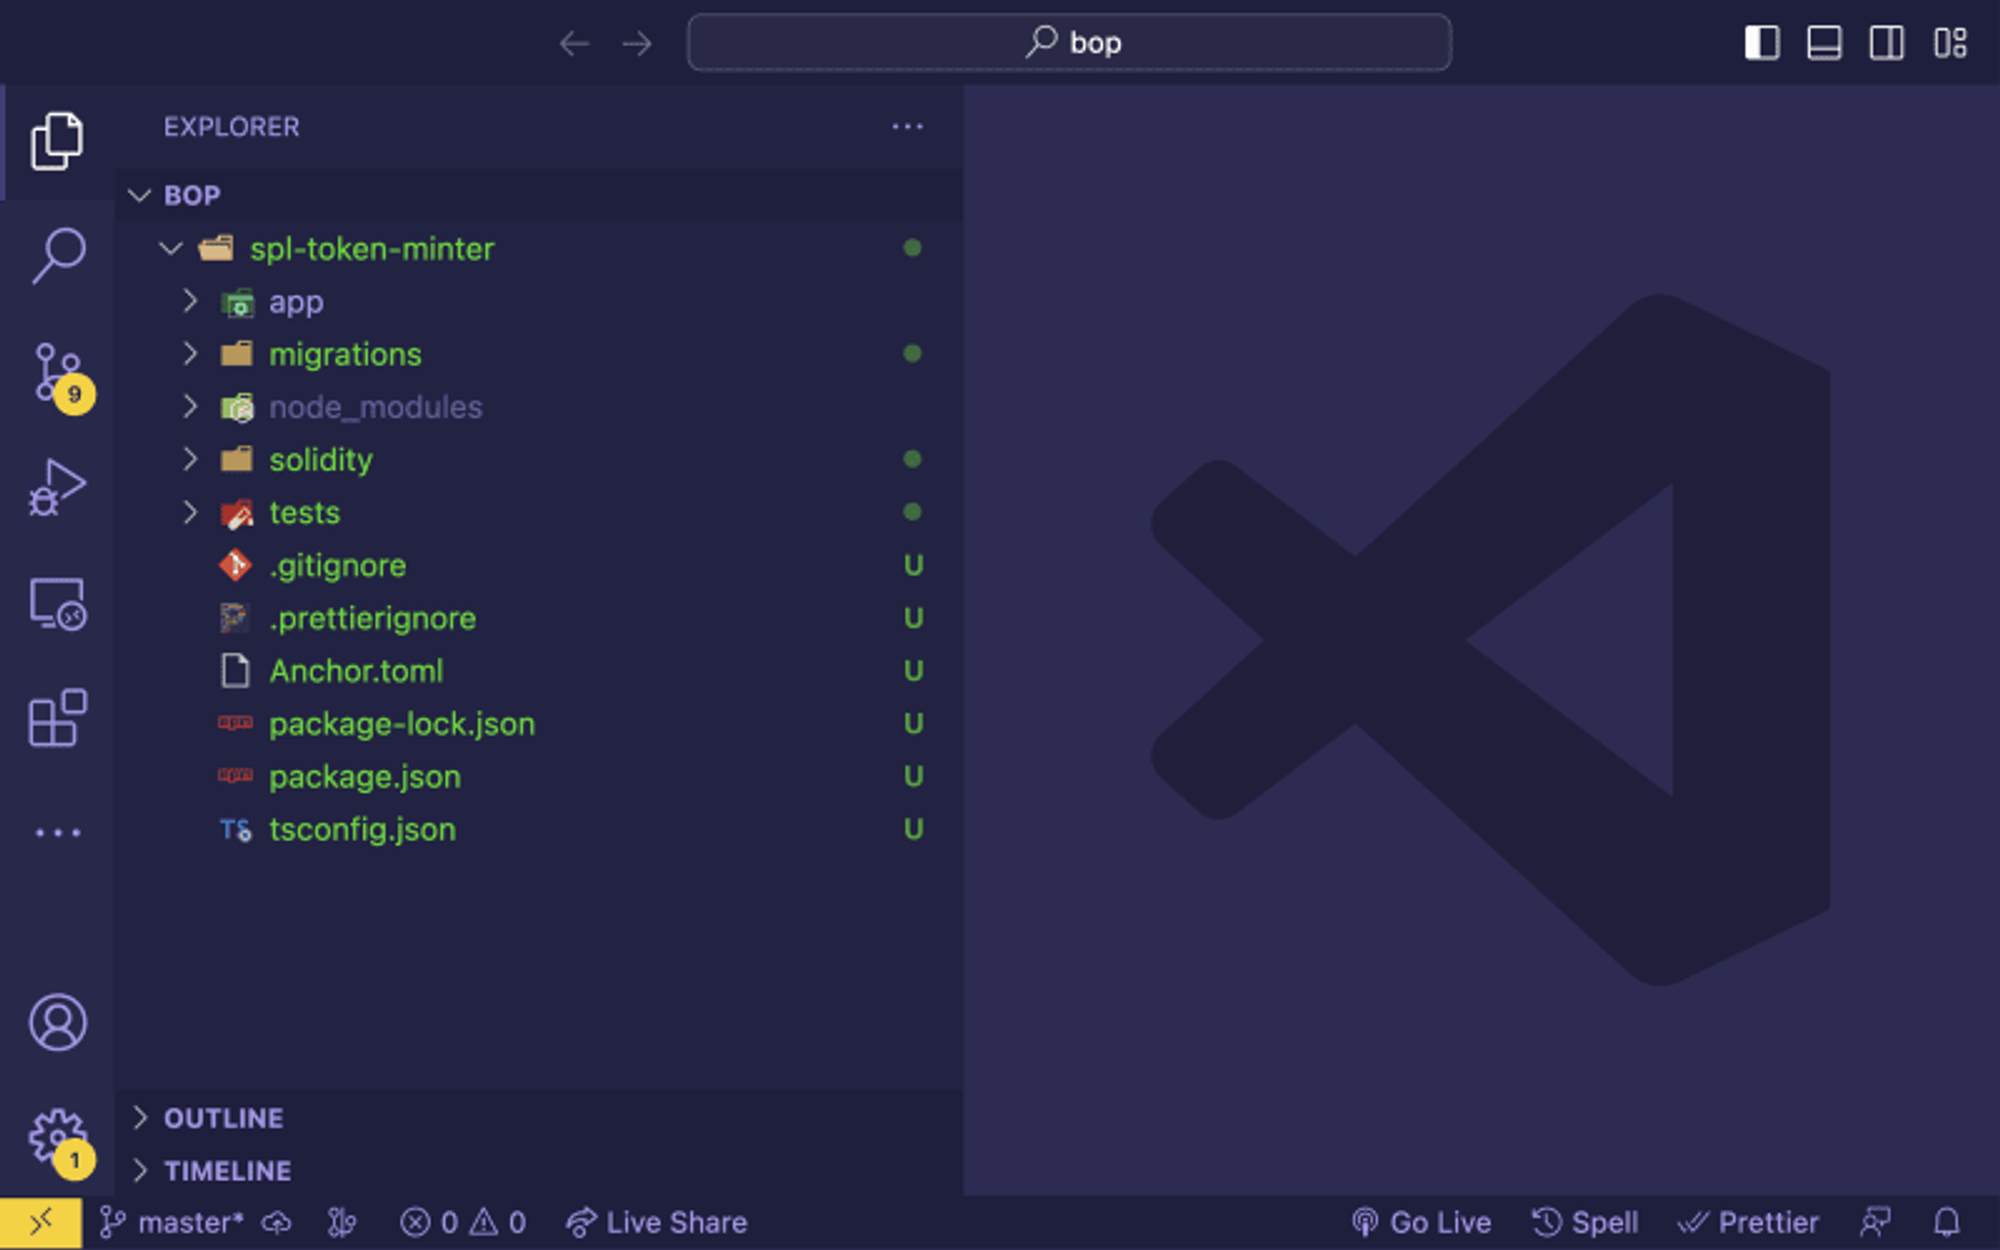
Here's a quick guide to the main parts:
- app: If you're adding a user interface, this folder will contain the frontend code.
- solidity: Your Solana smart contracts in ".sol" files live here.
- tests: Use this space to check your contracts, ensuring they work as expected.
- anchor.toml: This tracks your project's dependencies and settings, like Node.js's package.json. Use the toml extension in VSCode for easier editing.
- .gitignore: This file tells GitHub which files or folders to ignore when you upload your project.
For now, you can focus less on these files: migrations, node_modules, .prettierignore, package.json, tsconfig.json. We'll cover them later.
Note: If you've worked with Ethereum and Solidity before, you're probably familiar with Mainnet and Testnet. Solana has an extra option:
Types of Solana Blockchain Clusters:
- Mainnet: The real Solana Blockchain, where actual SOL cryptocurrency is used. Once your program is live here, its actions are permanent.
- Devnet: This is where most of your development will happen. It's a test environment for your Solana programs, where you can get free SOL for testing purposes. Keep in mind, that things here can be reset, so they're not permanent.
- Testnet: Similar to Devnet, Testnet is where Solana's main team tests new features in a live environment. It's primarily for performance and stability checks. Like Devnet, you can get free SOL here, but it's not real money.
Most of your work will be on Devnet unless you're directly working with Solana's protocol.
In the anchor.toml file, you'll need to change the cluster setting from localnet to devnet, like this:
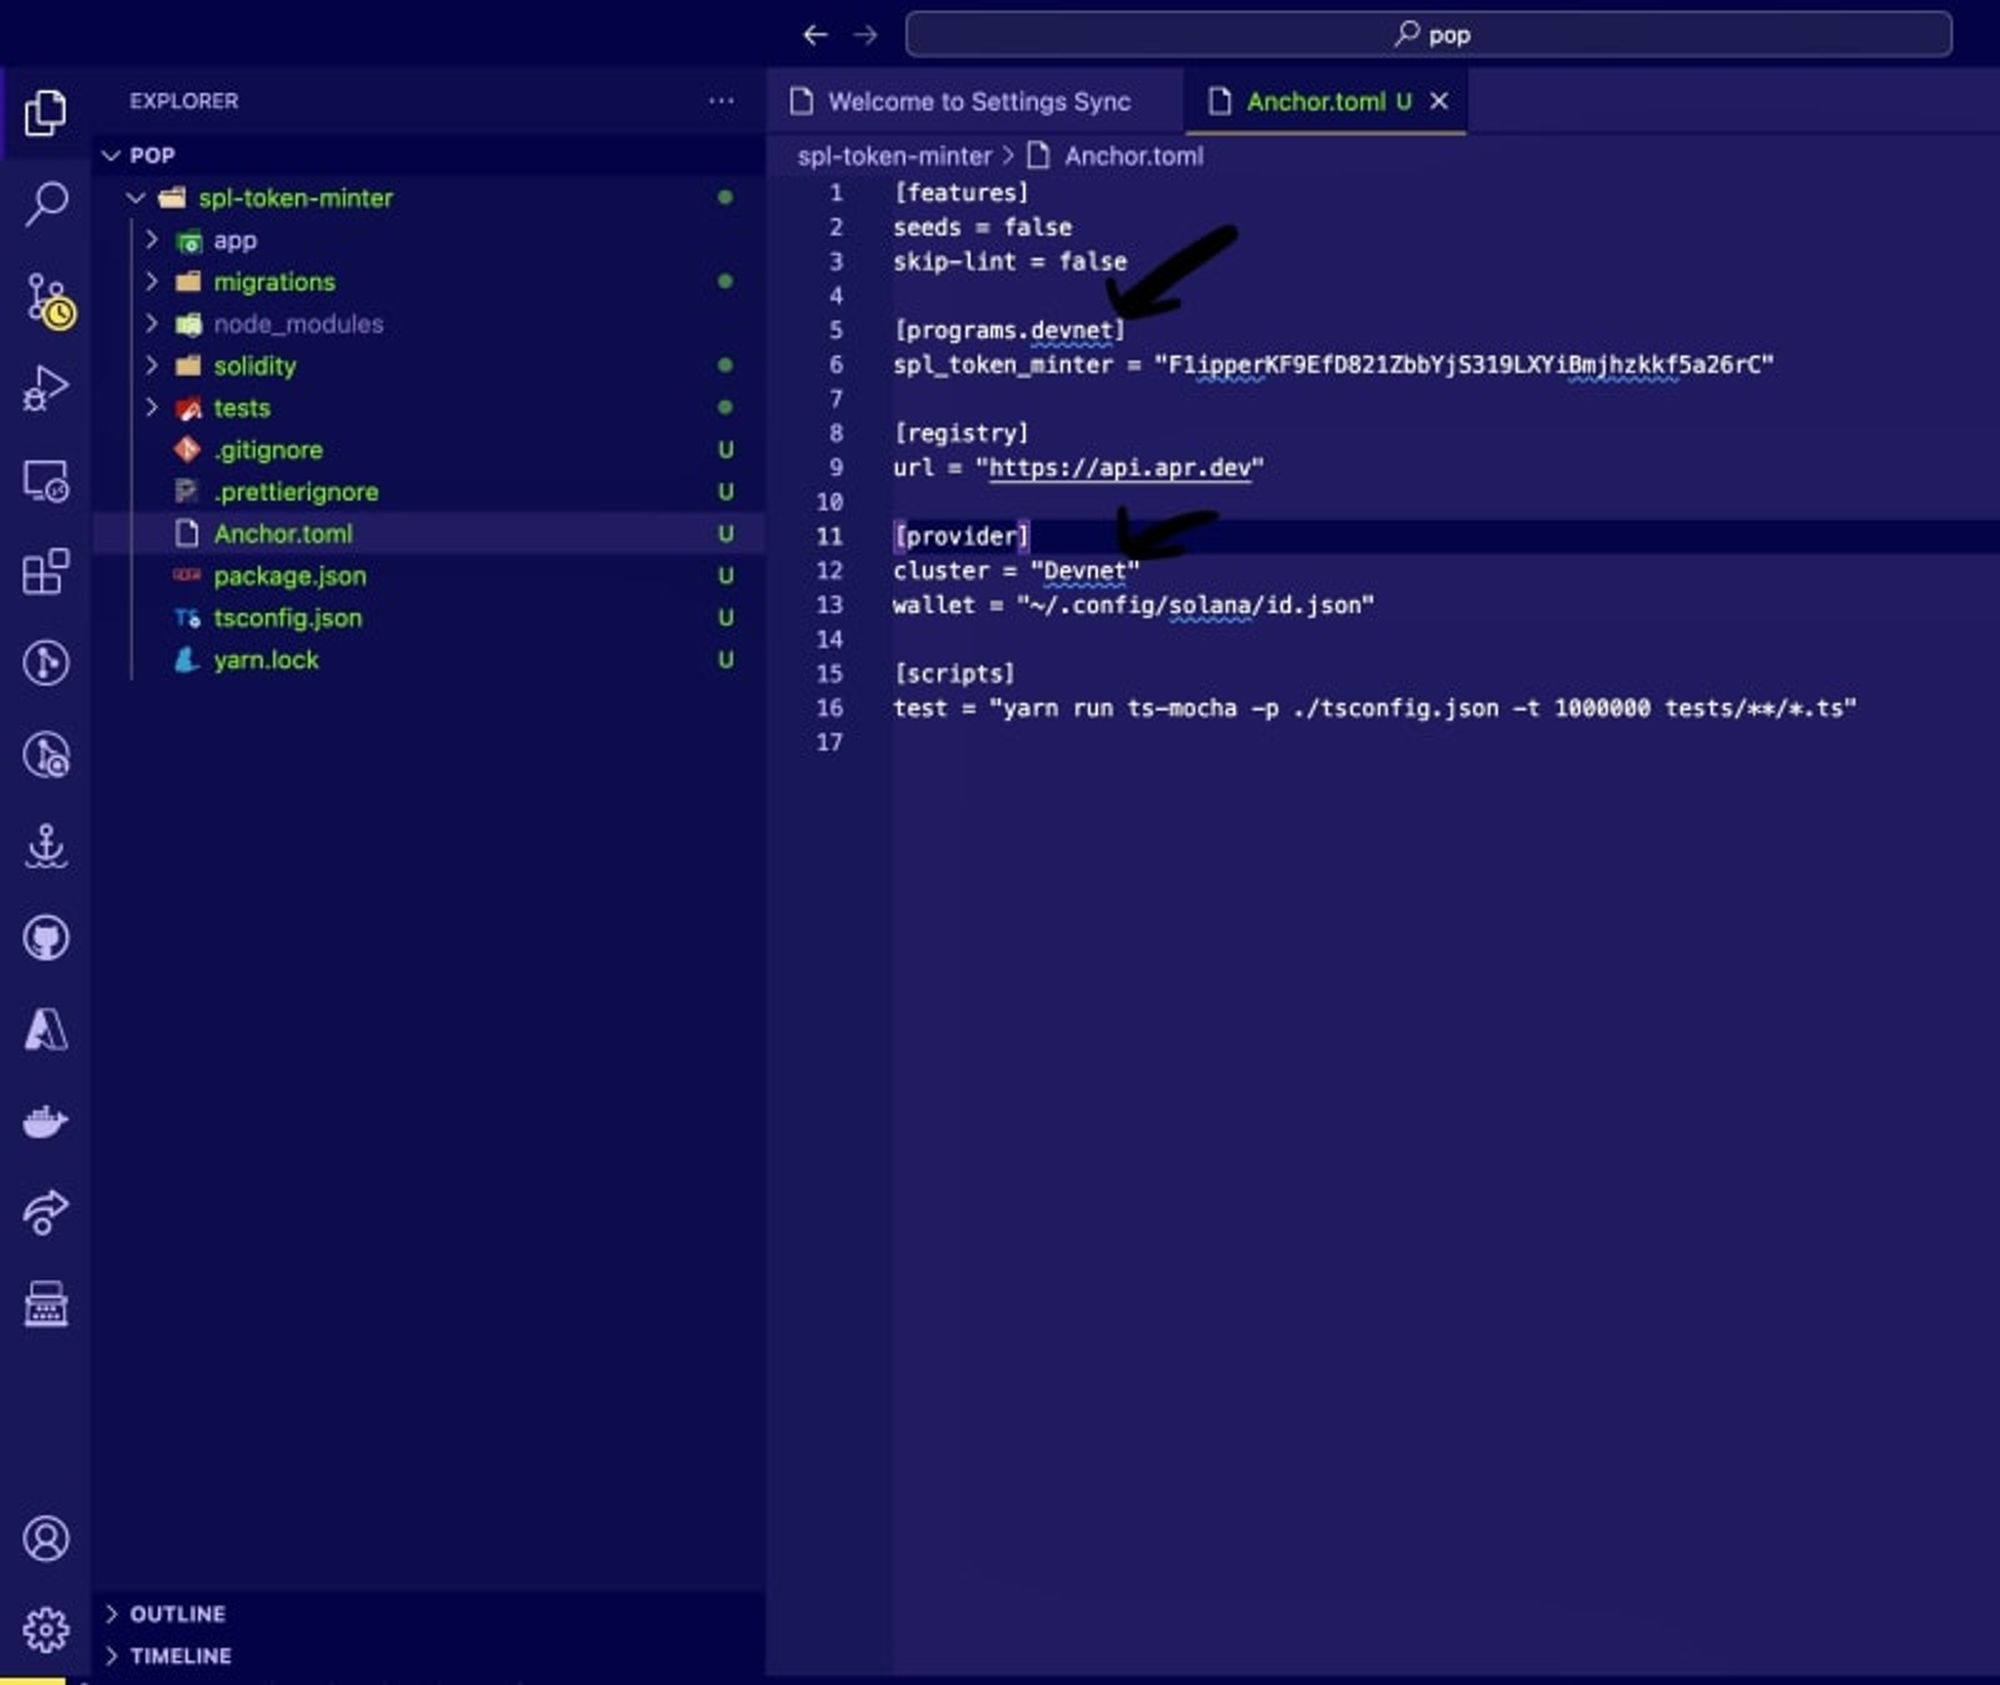
Next, update the wallet in your .toml file to your newly generated keypair address.
Now, let's look at the starter code. Inside the ./solidity directory of your project, you'll find a contract named spl-token-minter.sol, which includes:
- A constructor for initializing state variables.
- A function to update the state variable.
- A function to log messages in the program.
- A function to get the current value of the state variable.
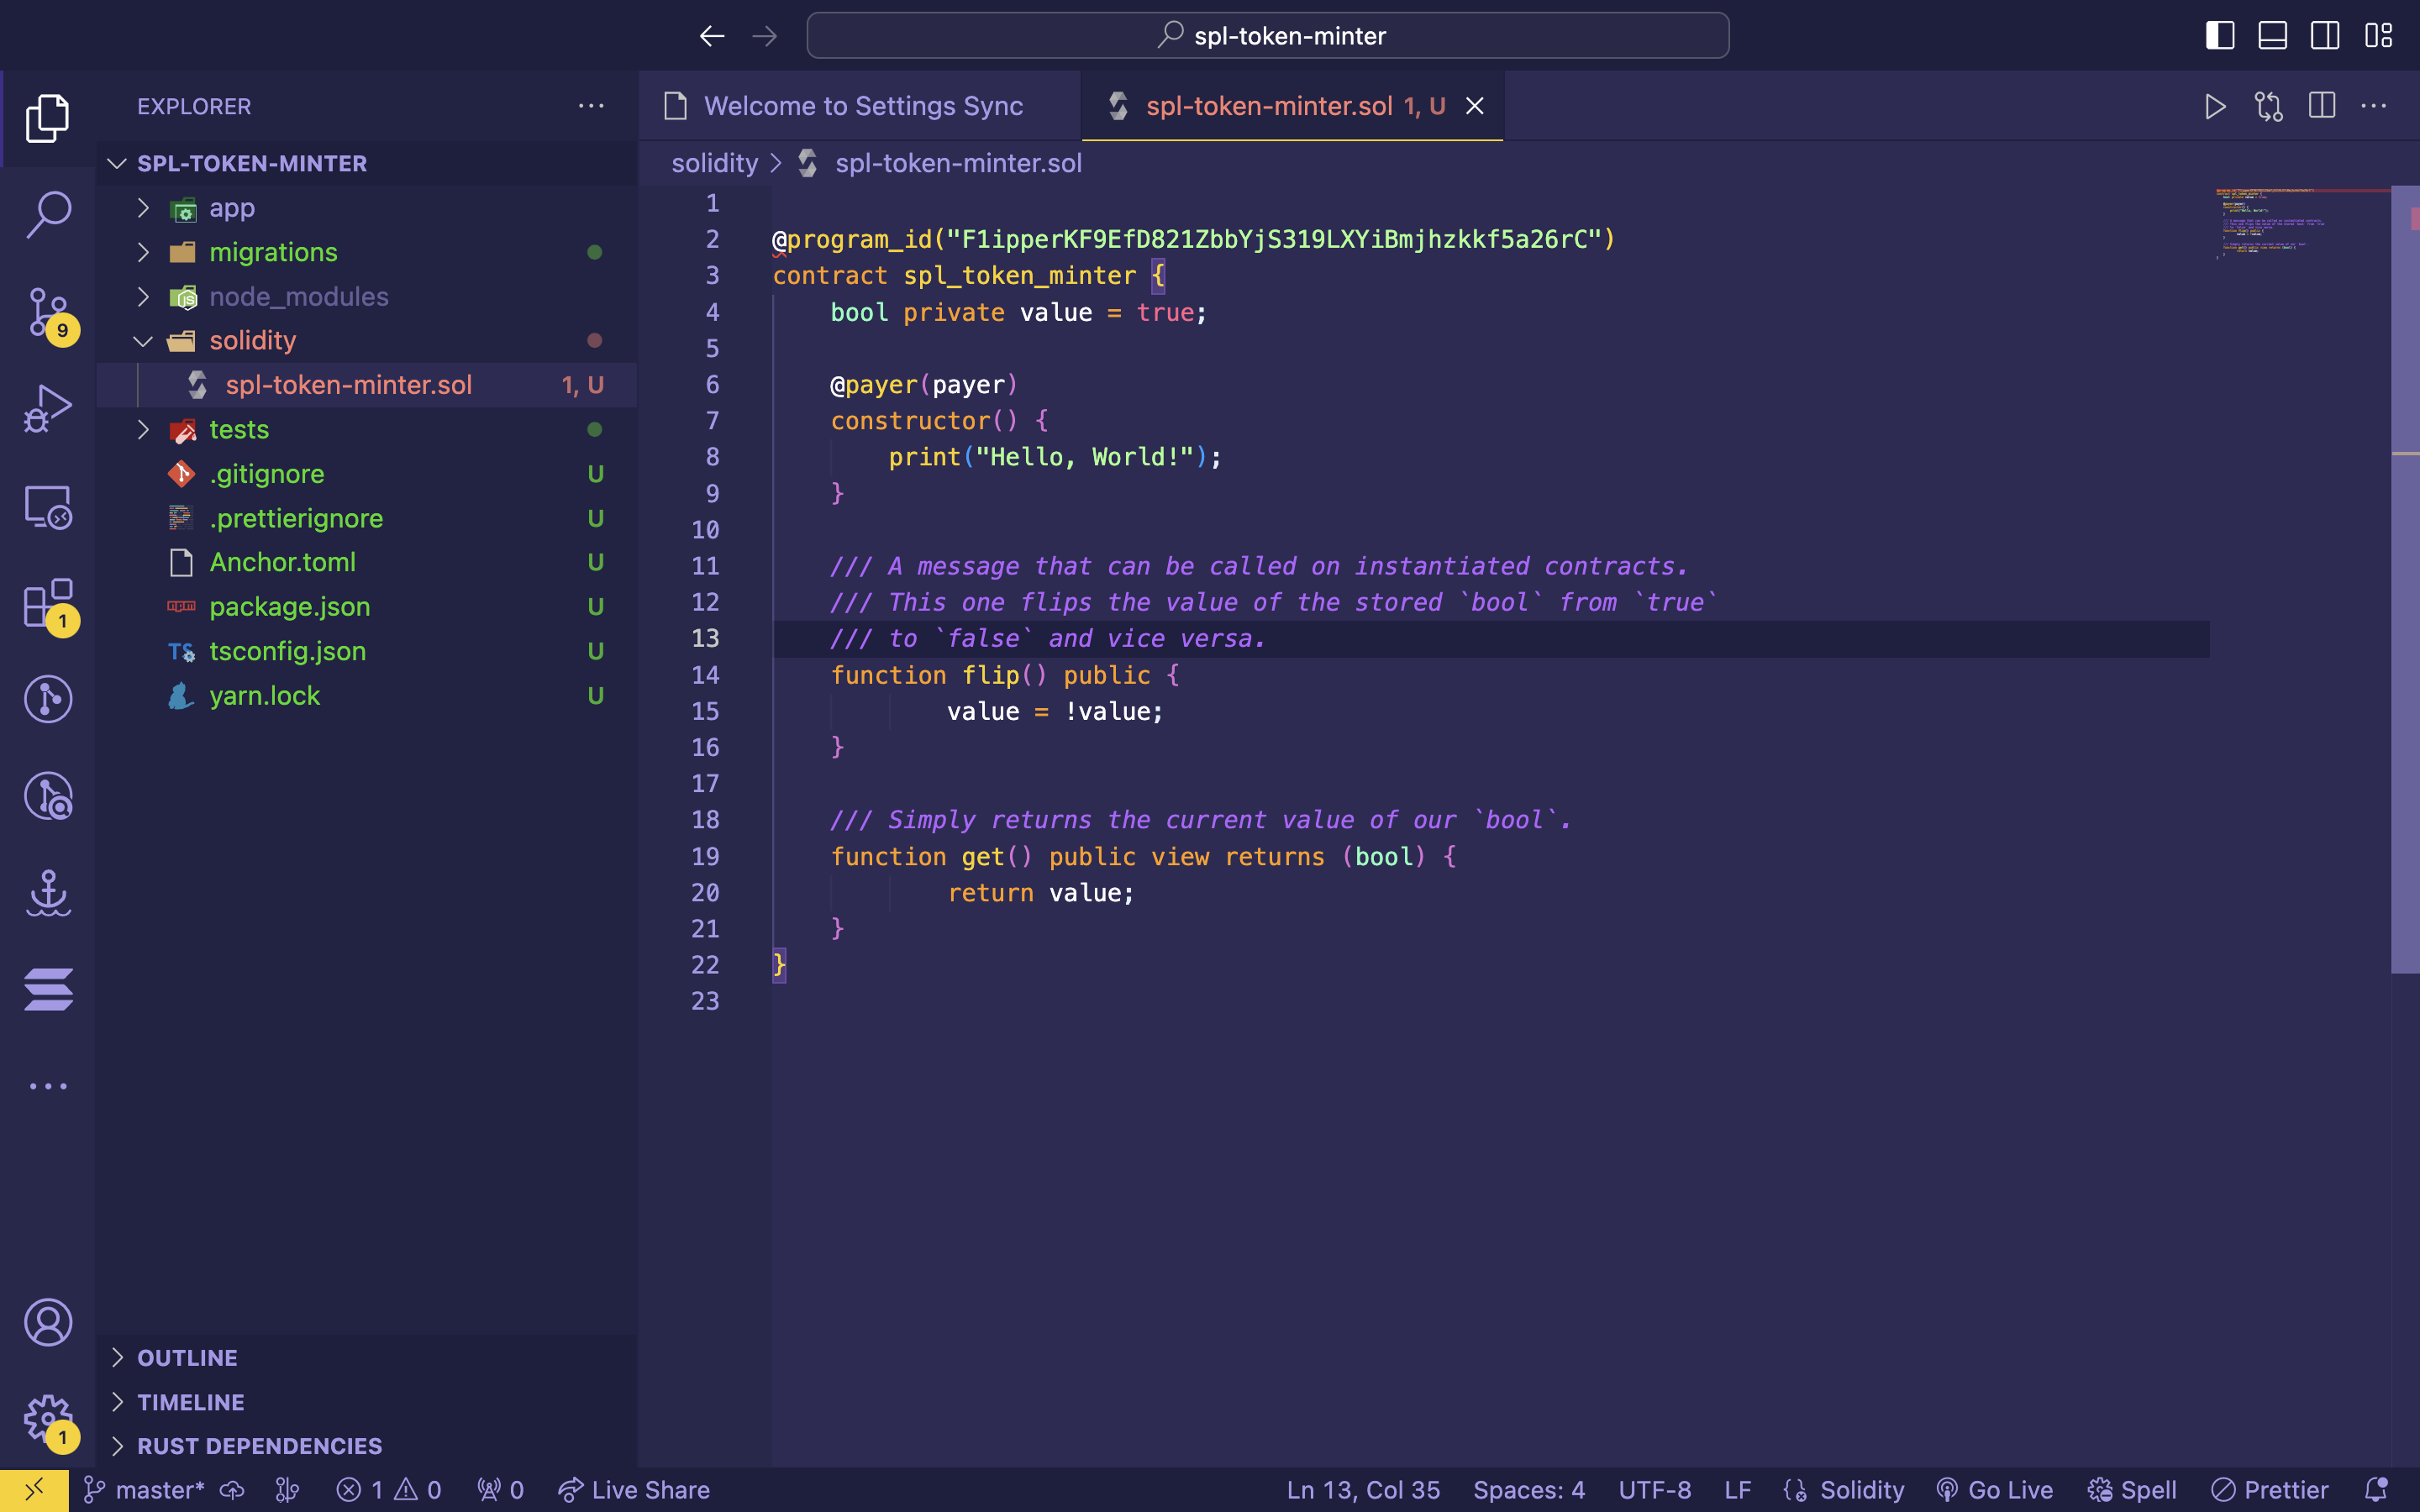
When comparing to Ethereum's EVM smart contracts, you'll notice two major differences:
The @program_id annotation:
In Solana, smart contracts are called programs. The @program_id annotation specifies the program's on-chain address.
@program_id("F1ipperKF9EfD821ZbbYjS319LXYiBmjhzkkf5a26rC")
The @payer annotation:
In Solana, you need SOL to cover storage costs when storing data. The @payer annotation indicates who will pay for creating the account that stores the data.
@payer(payer) // payer for the "data account"
constructor(address payer) {
 print("Hello, World!");
}
Storing State Data
A key difference between EVM smart contracts and Solana programs is in how they store state data:
- EVM smart contracts store state variables directly within the contract.
- Solana programs, however, use separate accounts, known as data accounts, to hold state data. These accounts are managed and owned by the program.
For example, when you deploy the contract, it goes to the address specified in @program_id. Upon calling the constructor, a separate account is created for storing the state variable, rather than storing it within the contract itself.
This distinction is crucial for understanding how Solana operates differently from Ethereum.
In our next lesson, we'll dive deeper into creating our first Solana program using Solidity. Stay tuned!